The chevron is a bold and versatile design, yet very simple to do.
Subscribe to My Crochet Channel or go to: YouTube.com TanisGalik
 The basic chevron stitch consists of valleys and peaks creating a gentle wave. Whichever pattern you follow, the important thing is to always balance your valleys and peaks. I’m uniting or decreasing three double crochets in the valley and increasing three double crochets in the peak. Each chevron design will be different – decrease five and increase five or unite two, chain one, unite two and increase two, chain one, increase two at the top.
However, you may be wondering how you go from a straight foundation chain to create that rippled effect. This design is a 12 + 1 count, meaning a foundation chain that is divisible by 12 plus 1 extra chain. Since I’m working in double crochets, I begin the row with a chain three. Then I make another double crochet in the same last chain space. The beginning and end of each row will have two double crochets in the first and last stitch. Of course, when you are beginning the row, you’ll have a chain three representing the first double crochet.
For this design the sides consist of four double crochets. After working a double crochet in each of the next four chains, I’m ready for a decrease or a dc2dec.
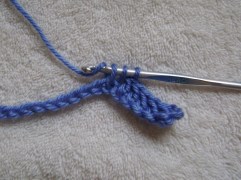
To make a dc2dec you’ll be uniting double crochets together. Begin a regular double crochet with a yarn over, insert hook into next chain, yarn over, pull through (Picture 1), yarn over and pull through two loops on hook and stop. You are making only half of a double crochet. Repeat this process into the next two chains. Now you are ready to unite the three double crochets into one stitch. Yarn over and pull through all the loops on the hook (Picture 2). This is the valley or bottom of the wave.


Work the next side with a double crochet made in the next four chains. Now it is time to create the peak or top of the wave.
Since I decreased or united three stitches at the bottom of the wave, I’m going to increase with three double crochets at the peak. Make three double crochets in the next chain.
Work down the other side with double crochets made in the next four chains. You are ready for another valley. Repeat the pattern until you reach your last side of four double crochets. In the last chain (or double crochet) make two double crochets. The row is complete, turn and you are ready to begin again.
Work as many rows as you like to create a thick or thin stripe. When you work your first change color row, you can continue to work through the top two loops of each stitch. Or you may choose to work the entire row in the front loop only or the back loop only, depending if you are working on the right or wrong side of the fabric. This will create a ridge dividing the different colored stripes and adds a nice touch.
This bold design makes a great baby blanket or afghan. And best of all, it’s the perfect pattern for using your scrap yarn stash. Make each stripe a different color or join yarns as you go to create your one-of-a-kind masterpiece.